A couple weeks ago I decided to paint some faux hing straps on our door. This project came about because the hinges that I wanted were not within our budget. :/ I was then reminded of my trip to Italy in 2005 and how I couldn't get over the fact that soo many things were faux, and easily painted. This project took me less than an hour to complete, and the materials were less than $2, compared to over $100 we could have spent on each hinge. I am really happy with the results and they actually look like real door straps, it is hard to tell just from five feet away!

$3 IKEA RUG CHAIR COVER:

MEAL PREP:
Food! A big chunk of money is lost when not planning meals. This isn't a new idea and most of you already know about that. However, even though I know this..I wasn't implementing it in our life. So I decided that I needed visual references to help me do this. I also like making meals that share many of the same ingredients...plus, that naturally saves money. :)
So what I did was print out pictures of some favorite meals from my pinterest board [you can obviously do this with a magazine too] and then I rubber-cemented them on to heavy cardstock.
I then found some clothespins in our tool box, and clipped them on the side of our chalk board in the kitchen. I then wrote the basic ingredients that each meal needs next to the image. To the left of that is a column for what I need to buy for any of the meals.

And then on the back of each picture is the actual recipe and website. The simple recipe below is of the cucumber -lemon water.

- - - - - - - - - - - - - - - - - - - - - - - - - - - - - - - - - - -
EMBOSSING:

Birthday Candle Holders!!! :)


1.
- Take a photo of your silhouette.
- Open your photo up in Photoshop. ::: If you do not have Photoshop on your comp. no worries. Simply take the photo of yourself/husband/child - print out and make a B&W photocopy [enlarge if needed] then using your light box or window, put the sticker paper over photo and trace the outline on the sticker paper.
- Photo is opened in Photoshop. Now go to Image > Grayscale > Discard :::: Then click Filter > Sketch > Photocopy :::: play w/ detail and darkness. Detail should be under a 5 and darkness around 50
- Print out on sticker paper - if you are using words, MAKE SURE THEY ARE REVERSED! :)
2.
- Take a cotton ball and dab some surface conditioner on it. Just like when you are using nail polish remover. Smear your plate with the cotton ball making sure the entire surface is covered. A light coat is all that's needed. Wait about 5 min or less to dry. REMEMBER: you have 4 hours to paint your image on your plate before having to condition it again.
3.
- With a dark pen, trace around silhouettes making sure to emphasize the small details. Using your tiny sharp scissors, cut from the inside of silhouette out :::: remember, you are making a hole. Some people forget this and cut around the silhouette if that makes sense?
- Place sticker paper on plate [Also, make sure that the silhouette fits the size of the plate] and with your finger nail go over the inside edges real good.
- Using a nylon brush, paint from the edges in. Try to use thin even coats of paint...this helps in preventing your silhouette for getting a bubbly line. Wait about an hour for the paint to dry completely. Peel off sticker SLOWLY and then using the same nylon brush [make sure to clean with cold soapy water after applying paint] paint over silhouette with glaze. Then wait 10 days for plate to FULLY dry. Plate should then be dishwasher safe. Surface cleaner, paint & glaze can all be found at Michaels.

This project requires wide masking tape. from the center to the sides, cover the inside of the basket with tape. Do this in 3 parts. 1. the back 2. the front 3. the bottom. Mark seams w/ a sharpie like in picture. MAKE SURE that once you have taped length-wise that you then put a couple horizontal pieces over the long strips just so it makes it easier when peeling off from basket. Once all three pieces are marked, spread onto paper.
To save time, tape & paper... make a fold on the tape patterns, and then REMEMBER to put them on the fold of fabric when ready to cut.


- - - - - - - - - - - - - - - - - - - - - - - - - - - - - - - - - - - - -
This is a really EASY project to do...but just a little time consuming.


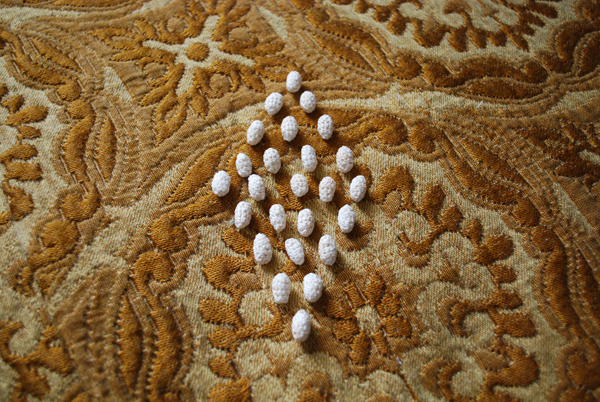
If I had more of the same or similar type of curtain fabric to spare, I would have added a 6" panel at the bottom, but since I don't..instead I used these cute teeny tiny hand crocheted beads from the 30's that I have had for some time now & stitched those at the bottom.


Get some scrap leather or go to the thrift store and buy a leather jacket/bag... this should
also be a very inexpensive project.

1. find a "circle" to trace that you would like your concho's to be.
2. cut circles out [preferably with sewing scissors...anything else will be hard on your hands] & then cover
the suede side generously w/ rubber cement. Let dry [this takes about 5 min or less]
3. put 2 suede side conchos together...press firmly, this keeps it from coming apart! LITERALLY - rubber cement will be your best friend when it comes to leather!
4. w/ scallop or pinking sheers - cut around circles to make decorative edge.
5. Hopefully you have a leather punch already - if not, they are between $20-25, punch tiny holes all the way around.
6. Take your Olfa/Exacto knife and slice two lines down the middle making sure they are at least 1/4" apart from each other and 3/8" wider than the "leather ribbon"
7. Cut two long strips of leather [width depends on you as well as length] rubber cement the suede sides, let dry, push together and then sew it up on your machine!
8. VOILA! Thee cutest belt you ever did see! This should take an hour or less to make...if making for children, a 1/2 or less! Have fun... :)


1 comment:
I'm absolutely blown away with your creativity and eye for style and flair! All of these DIYs are cool, Roxy! The DYI Channel needs you!
Post a Comment